Configuring L2TP connection on Ubuntu
Have you ever wanted to set up your own VPN server? By following the steps below, you can set up your own L2TP VPN server on Ubuntu 16.
Note that an L2TP VPN, which we're setting up here, is more secure than a PPTP VPN server. OpenVPN is another alternative to L2TP VPNs, but OpenVPN requires OpenVPN software on the client device.
In contrast, L2TP VPNs are supported out of the box in most modern operating systems (Windows, Mac OS X, Ubuntu, RHEL, CentOS) as well as mobile devices (iOS [iPhones, iPads], Android, and Windows Phone).
Ubuntu has stopped shipping L2TP over IPSec support since Precise. A workaround for this exists using network-manager-l2tp.
Go step-by-step through following instructions to set up L2TP/IPSec VPN on Ubuntu.
- Open Terminal

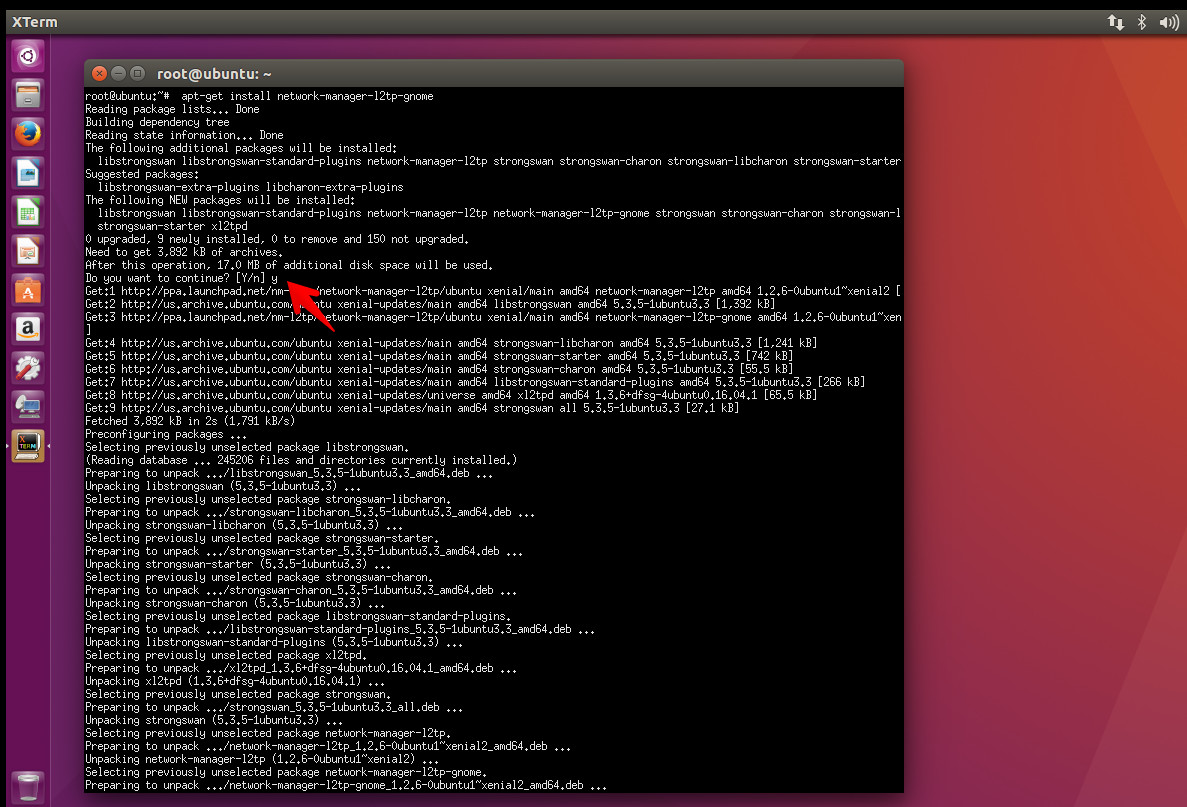
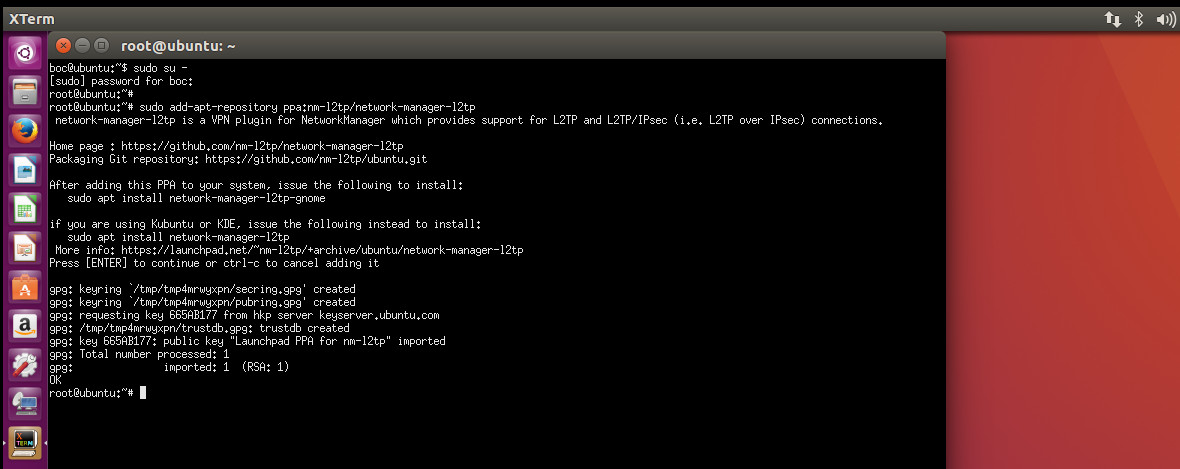
- If you want to use L2TP/IPsec on Linux you are probably going to need to install a few extra packages. Type following commands :
sudo add-apt-repository ppa:nm-l2tp/network-manager-l2tp
sudo apt-get update
sudo apt-get install network-manager-l2tp-gnome
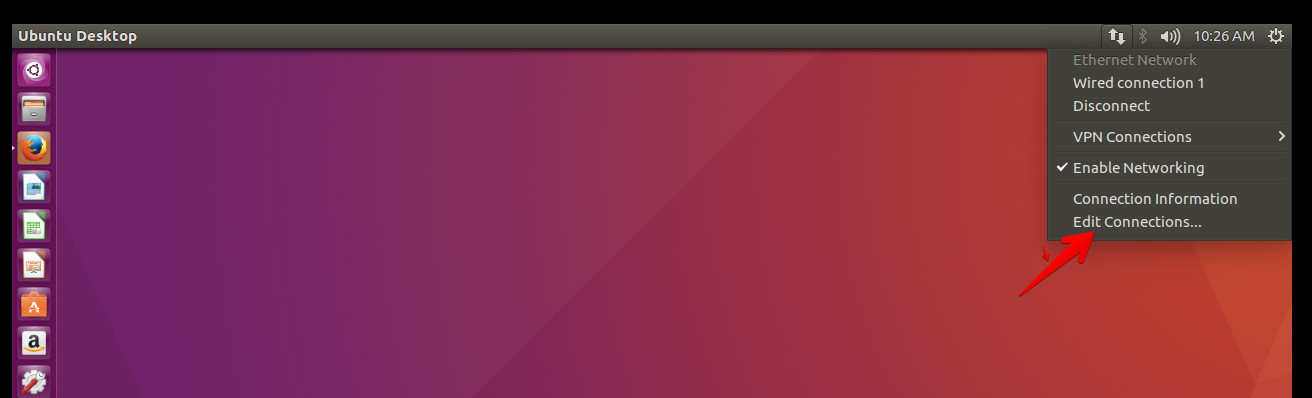
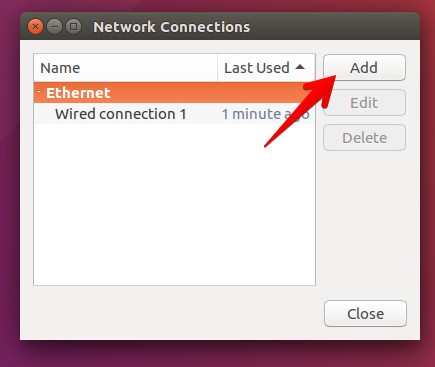
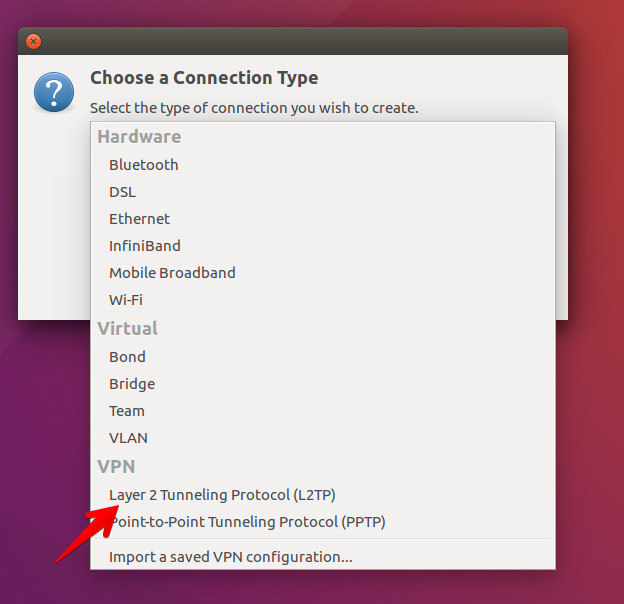
- Click Network Manager and select Edit Connection and press the Add button.
- In the Choose a Connection Type window select Layer 2 Tunneling Protocol (L2TP) and press the Create button.
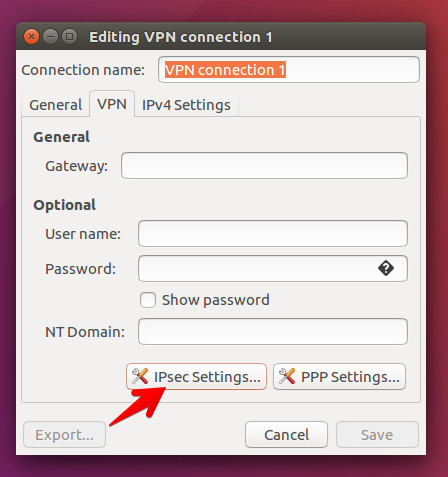
- Select Ipsec settings... and complete the form.
- Check the Enable IPsec tunnel to L2TP host checkbox.
Introduces IP address (received when you activate the VPN account on myip site) in the Gateway ID field.
If you have the Myip Personal package in the Pre-shared key field, enter myip.io.
For the Myip Dedicated package in the Pre-shared key field, enter the password for MyP Dedicated account.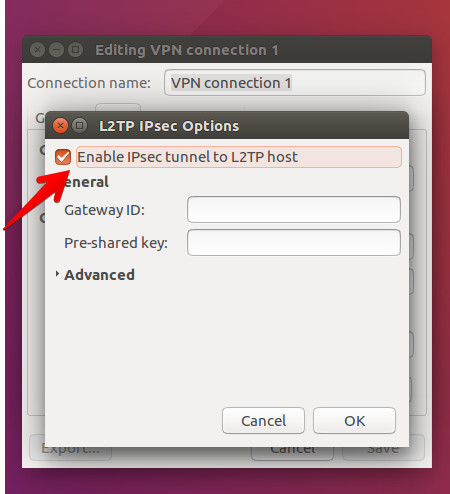
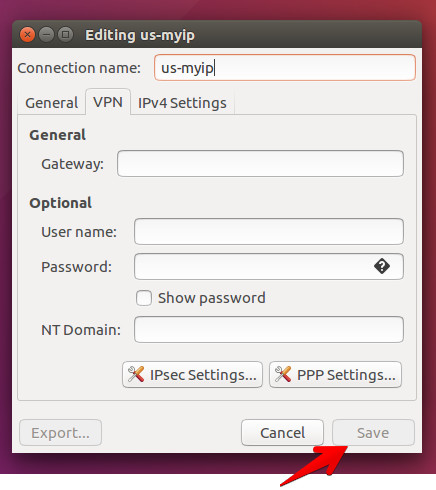
- Set a name for your VPN connection in the Connection name field.
Fill in the User name and Password fields your VPN username and password and click on Save button.
- The L2TP over IPsec VPN connection on Ubuntu is set up. Connect to VPN by choosing the created VPN connection from the Network Manager.